How to Turn Off Antivirus Windows 10 Pro
How to turn off Windows Defender in Windows 10 permanently? Sometimes you want to disable Windows Defender for testing purposes. If you have an Antivirus application running, Windows Defender will be automatically disabled. That's because your Antivirus software will take over the security from now on. This article will teach you how to turn off Windows Defender in Windows 10 temporarily and permanently.
Table of contents
- Windows Defender unable to stop service
- Check status Windows Defender in Windows Security
- Disable Windows Defender in Windows 10 temporarily
- How to turn off Windows Defender in Windows 10 permanently
- Step 1. Boot into safe mode
- Step 2. Turn off Real-time protection
- Step 3. Autoruns for Windows
- Step 4. Enable Windows Services in Autoruns
- Step 5. Uncheck Windows Defender Antivirus Service
- Step 6. Boot into normal startup
- Verify that Windows Defender is kept turned off after Windows 10 restart
- Revert the changes
- Conclusion
Windows Defender unable to stop service
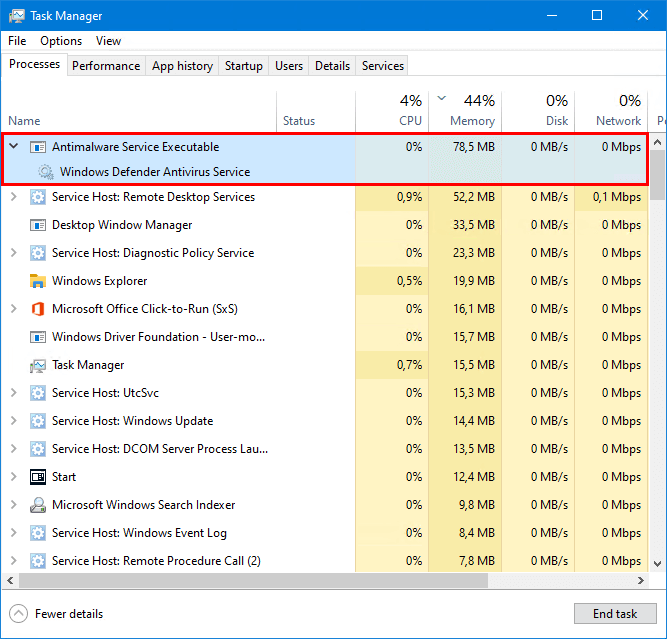
Start Task Manager on Windows 10. Find the Windows Defender service that is running. Search for the task name Antimalware Service Executable and the service Windows Defender Antivirus Service.
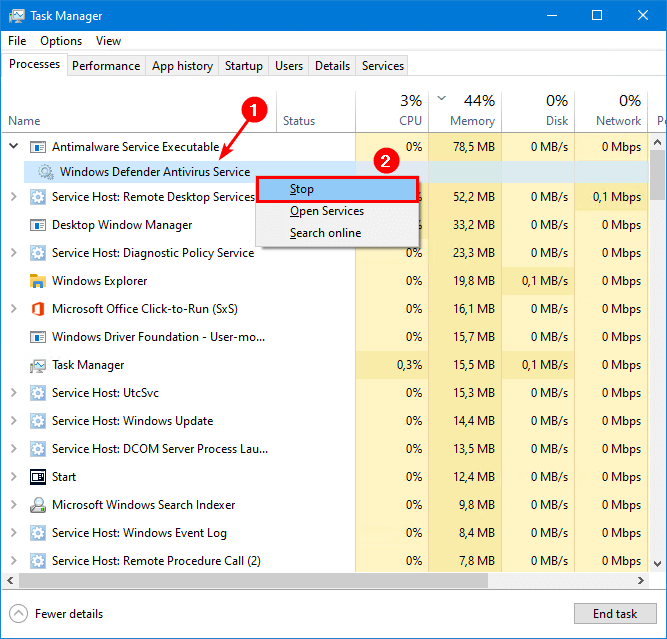
Right-click the Windows Defender Antivirus Service and click Stop.
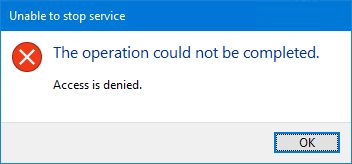
An error will show up that the operation could not be completed. Access is denied. It's unable to stop the service.
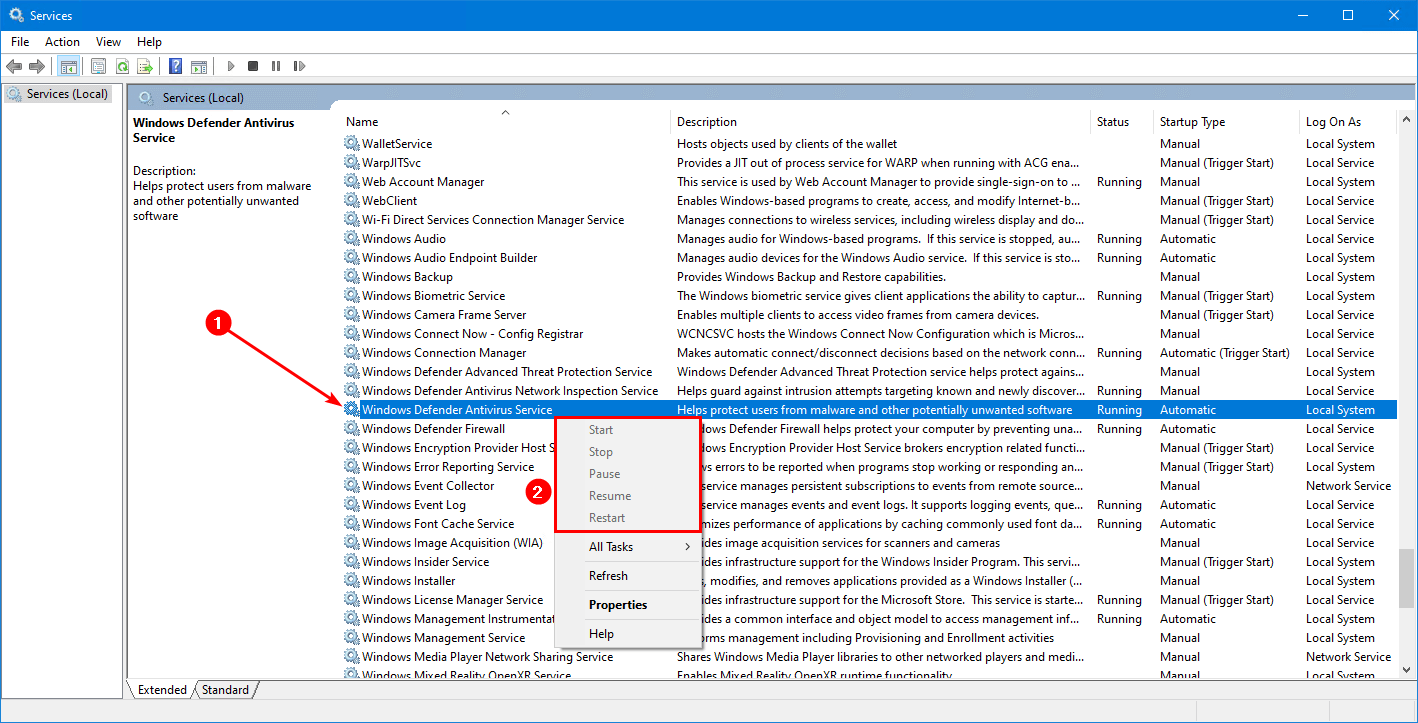
Start the application Services and right-click on Windows Defender Antivirus Service. You can see that the following options are greyed out:
- Start
- Stop
- Pause
- Resume
- Restart
Check status Windows Defender in Windows Security
Open the Windows Start menu. Type Windows Security.
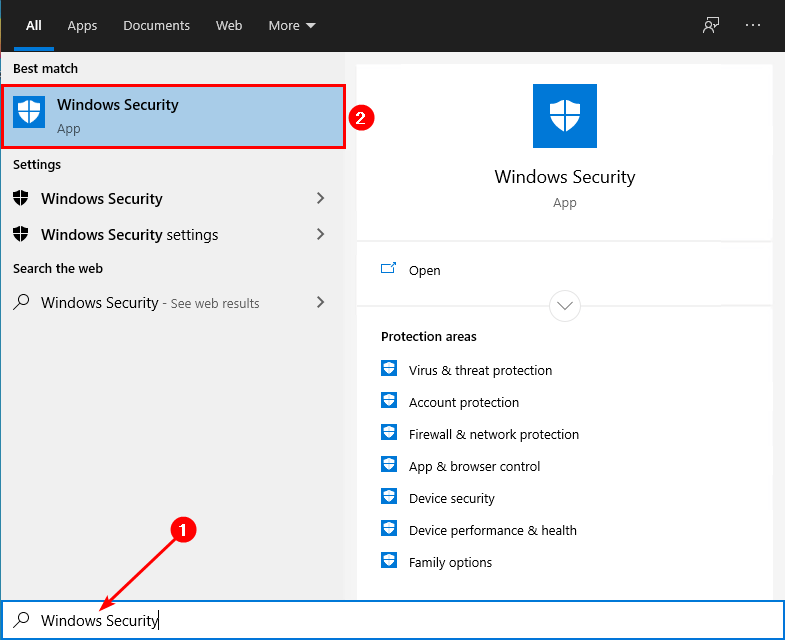
Click onVirus & threat protection.
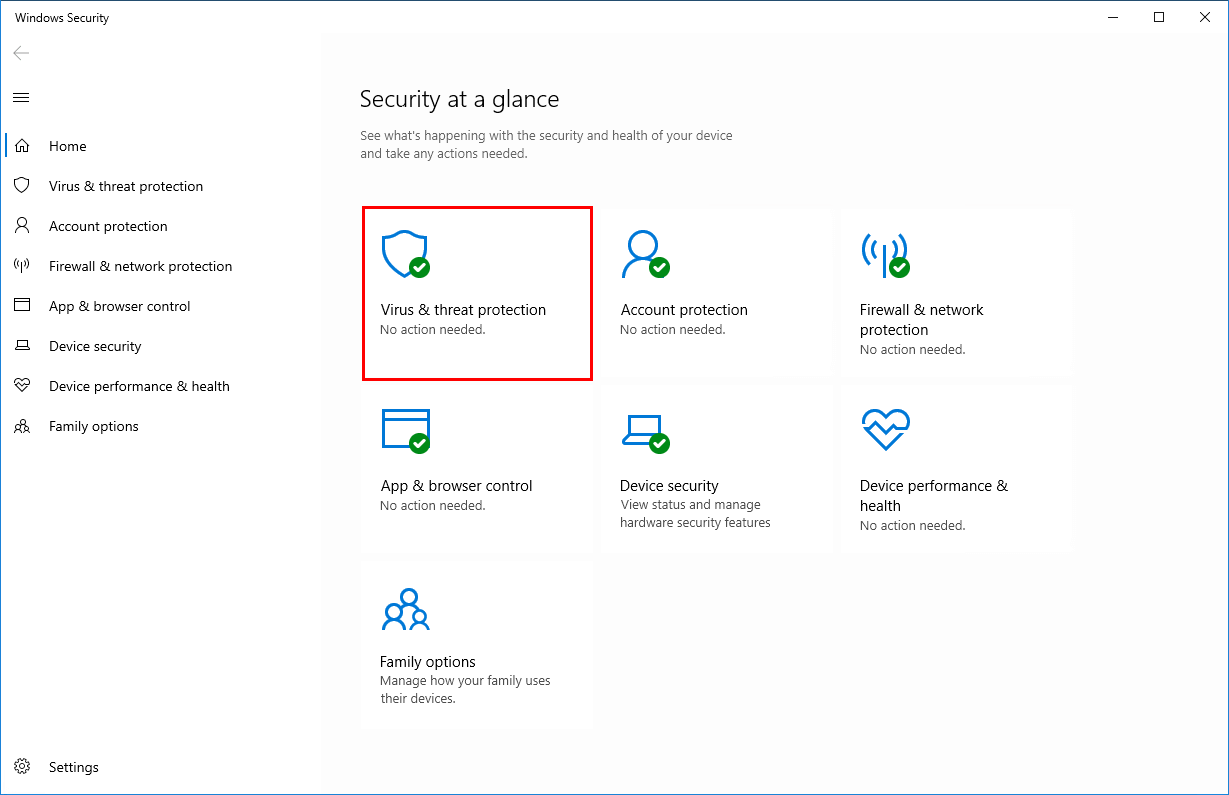
Windows Defender is enabled.

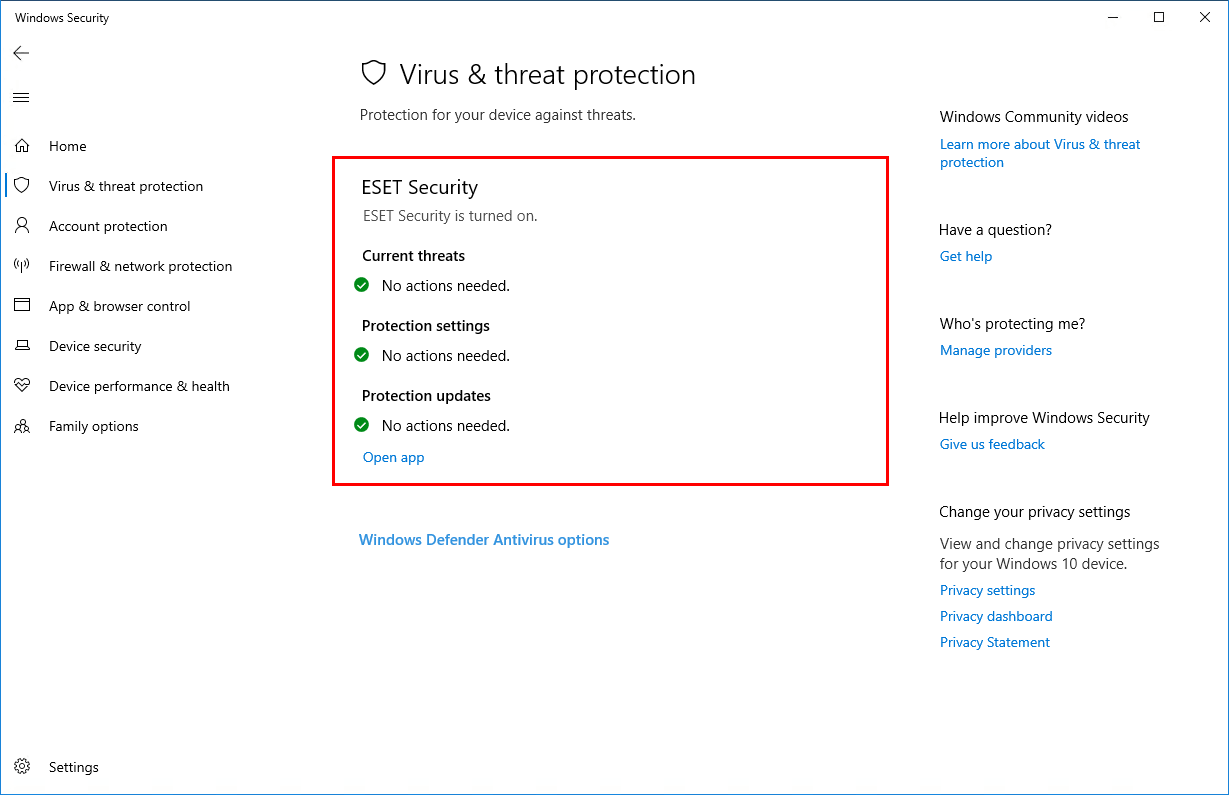
If you installed another security product, you would see the following screen.
Disable Windows Defender in Windows 10 temporarily
In Windows Security, click on Virus & threat protection.
Click on Manage Settings.
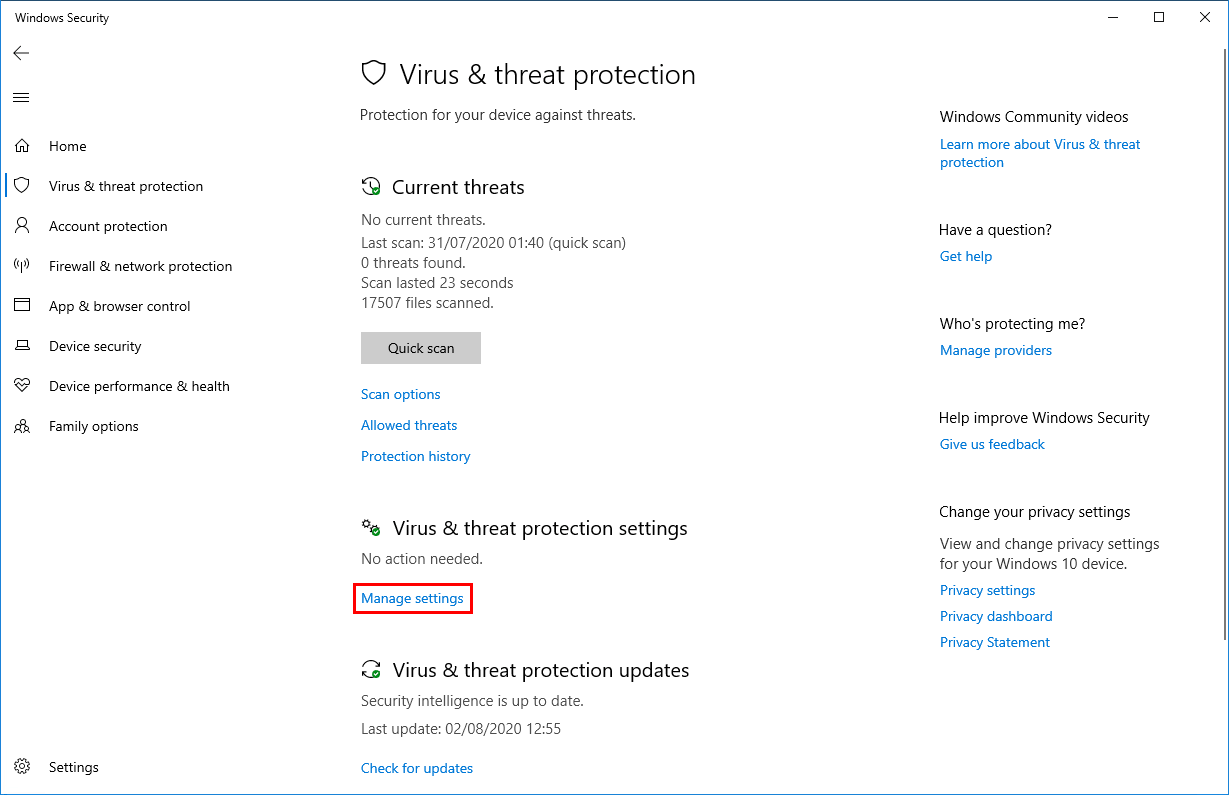
Click the toggle button under Real-time protection to turn off Windows Defender Antivirus.
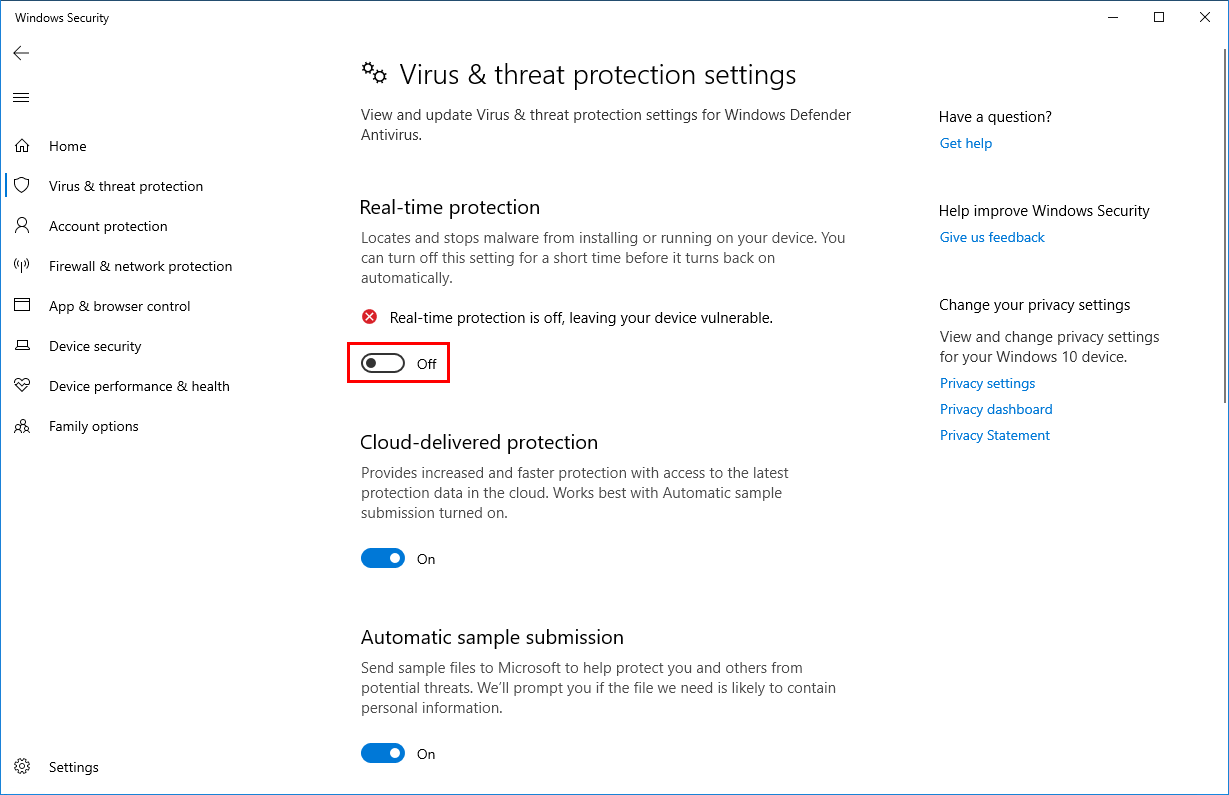
Doing that, you can see that:
- The service is still running in the background
- A reboot will automatically enable Windows Defender
How can you disable Windows Defender service completely and keep it disabled after a reboot? Find out in the next step.
How to turn off Windows Defender in Windows 10 permanently
Step 1. Boot into safe mode
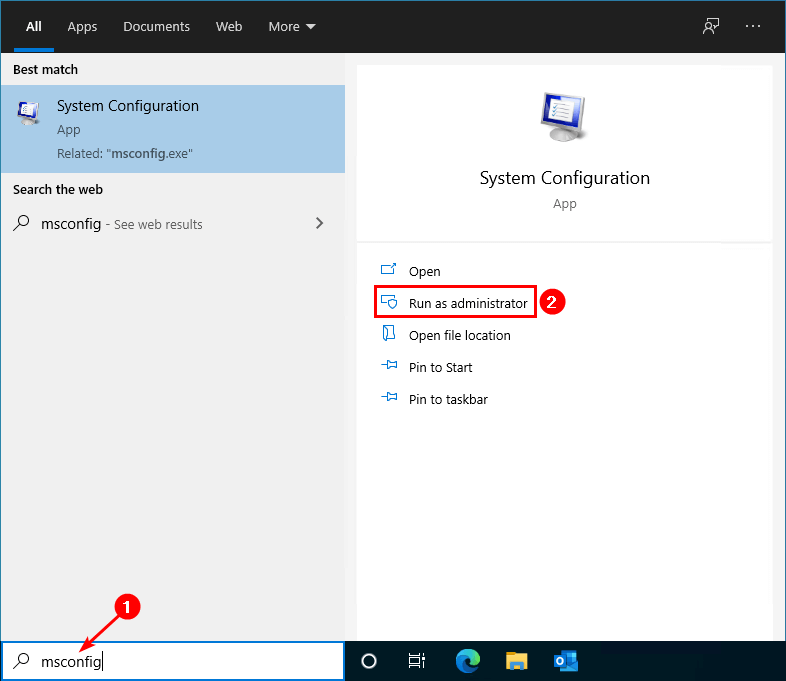
Click on Windows Start and search for msconfig. Run System Configuration as administrator.
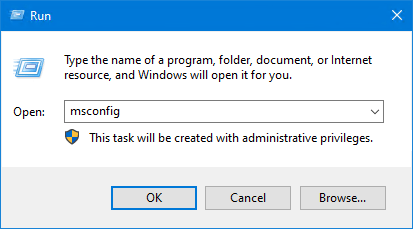
You can also start the program Run. Type msconfig and click on OK.
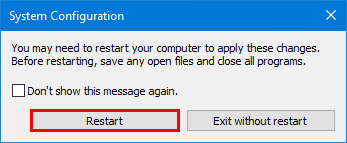
Select the tab Boot. In the section Boot options, enable Safe boot. Click on OK.
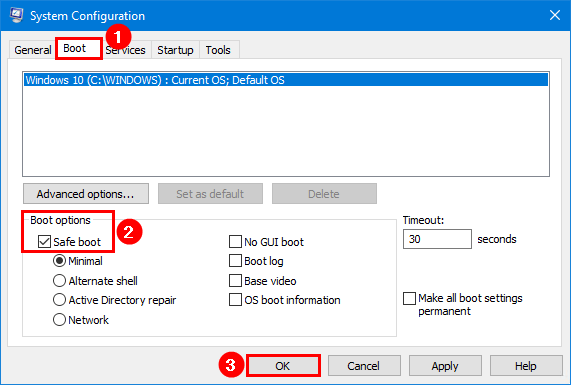
Click on Restart.
Step 2. Turn off Real-time protection
As shown in the previous step, make sure that Real-time protection is Off.
Step 3. Autoruns for Windows
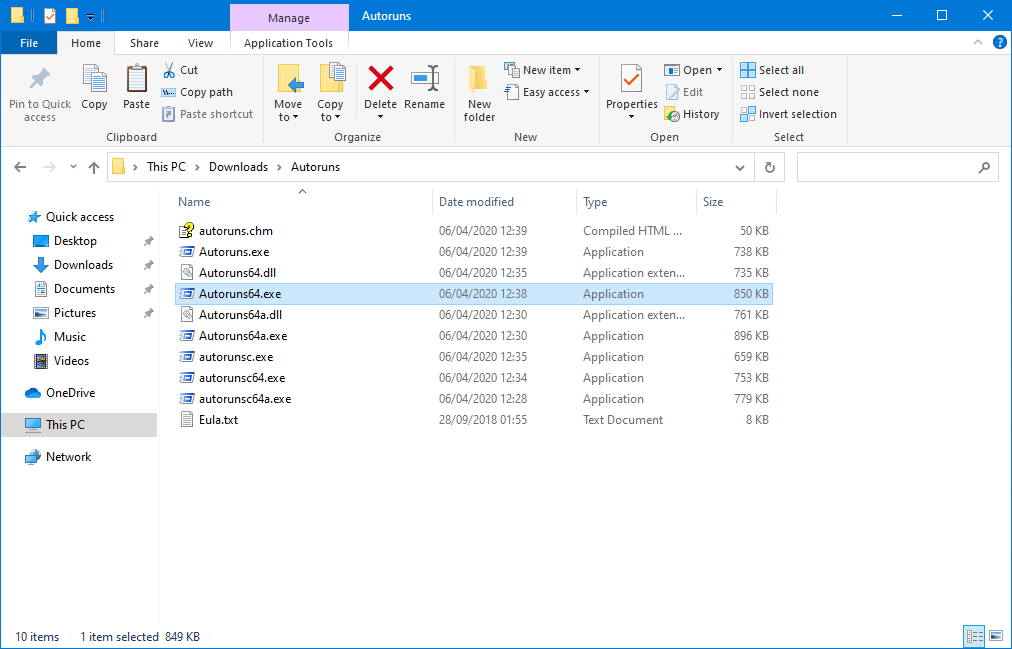
Download Autoruns for Windows. Extract the zip file and start the executable Autoruns64.exe. If you are running Windows 10 32-bit, start Autoruns.exe.
Step 4. Enable Windows Services in Autoruns
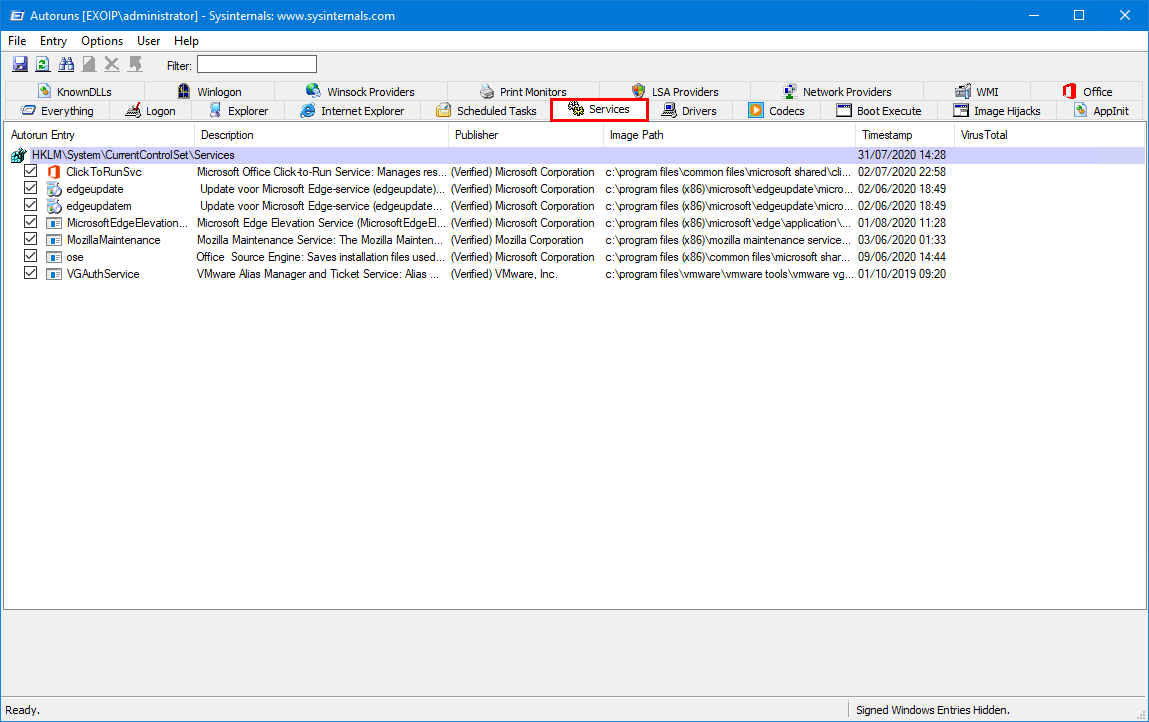
Go to the tab Services. There will be not many services shown. That's because Windows services are not showing by default.
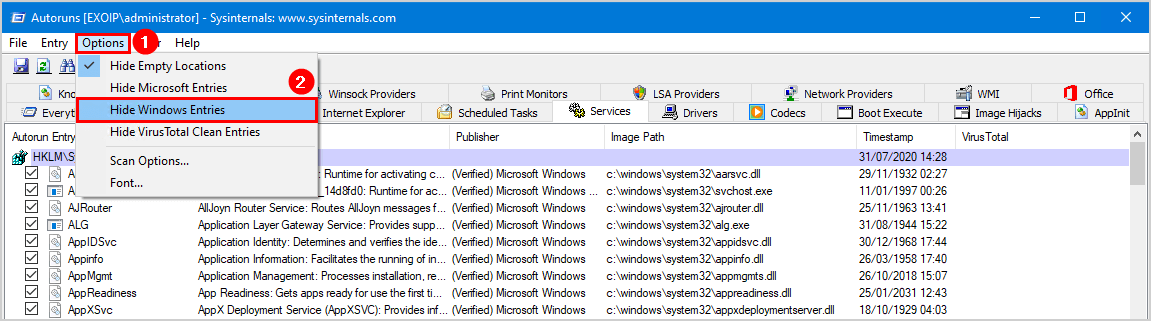
Click in the menu bar on Options. Uncheck Hide Windows Entries. It will show the Windows services in the list view.
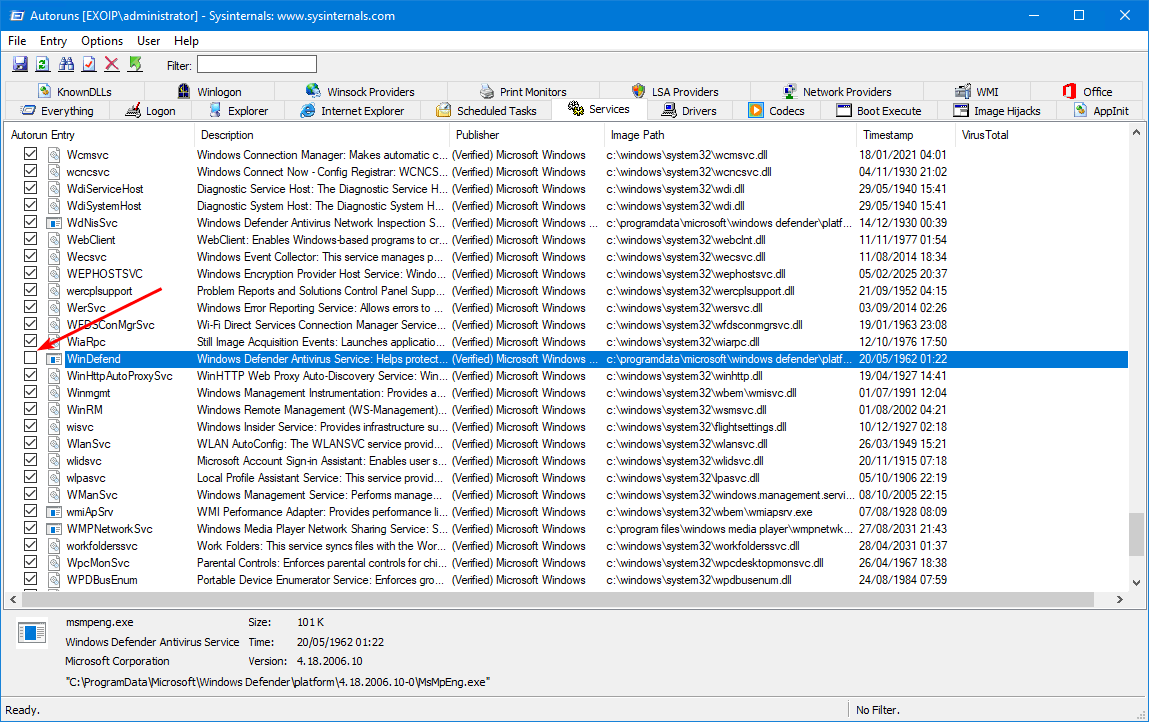
Step 5. Uncheck Windows Defender Antivirus Service
Search for WinDefend and uncheck the checkbox. Unchecking will prevent the Windows Defender automatic startup after every reboot.
Step 6. Boot into normal startup
Start the application msconfig.
Select the Normal startup. Click on OK.
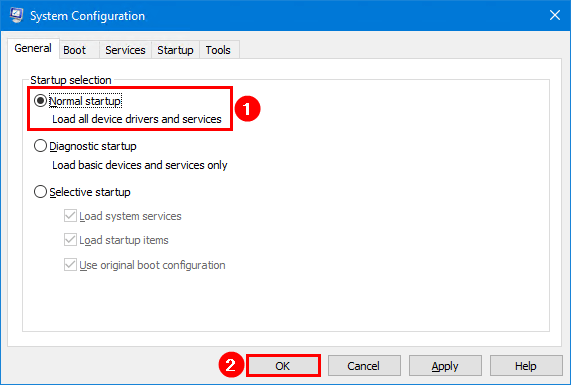
Click on Restart.
Verify that Windows Defender is kept turned off after Windows 10 restart
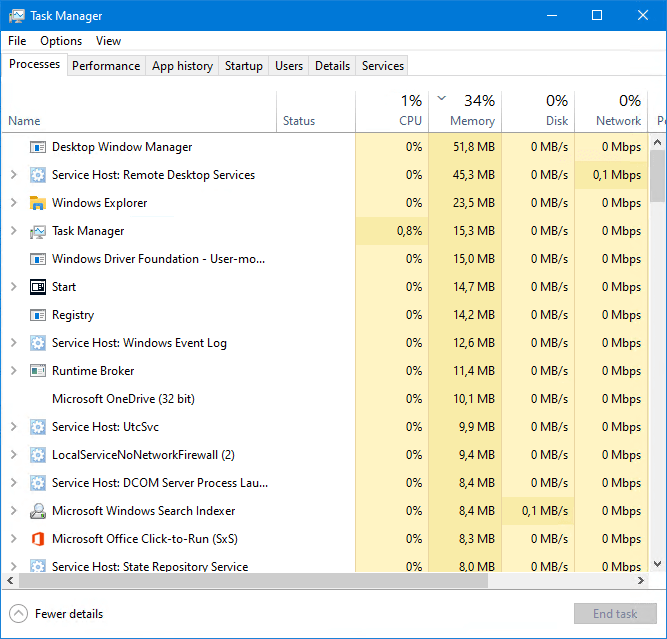
After a restart, start Task Manager. There is no more Windows Defender service running.
Start Windows Security and have a look at Virus & threat protection. You will see that there is a spinning icon, or the status is showing as unknown. That's because it's fetching the information.
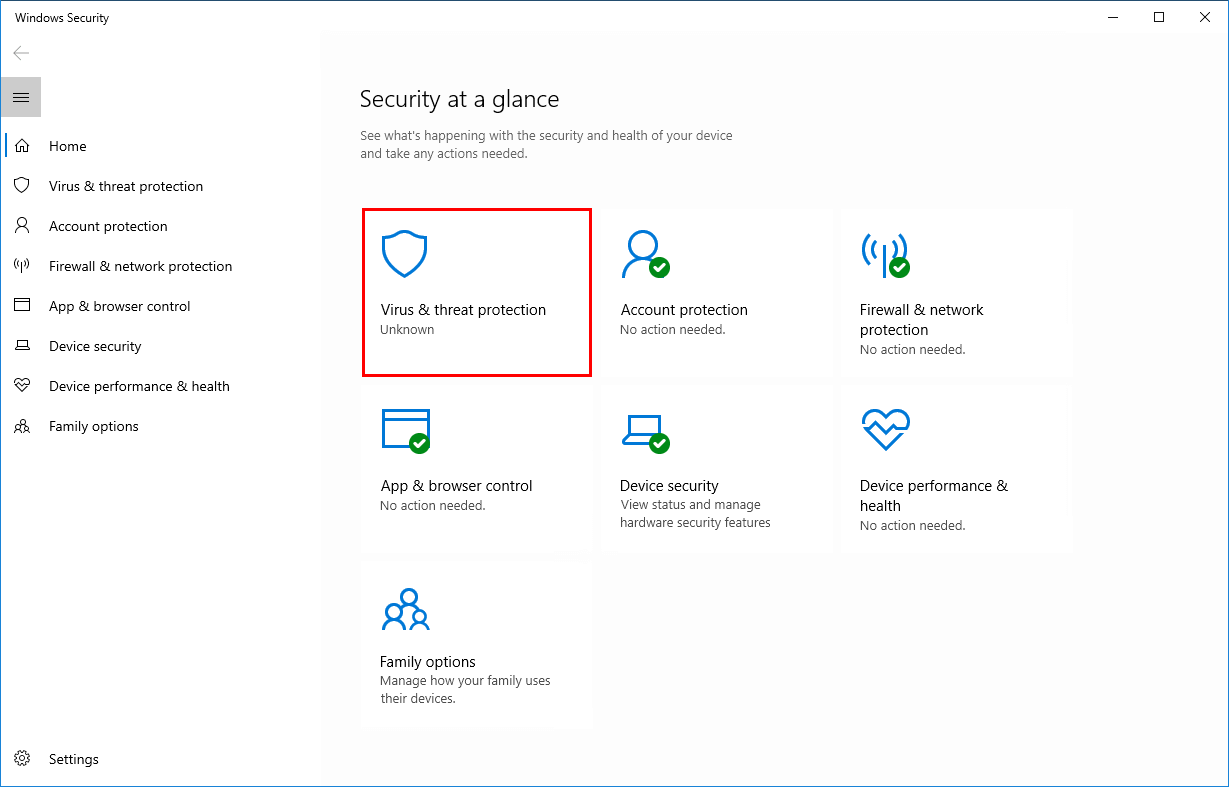
Give it a couple of minutes. After that, you will see that Virus & threat protection is disabled.
Revert the changes
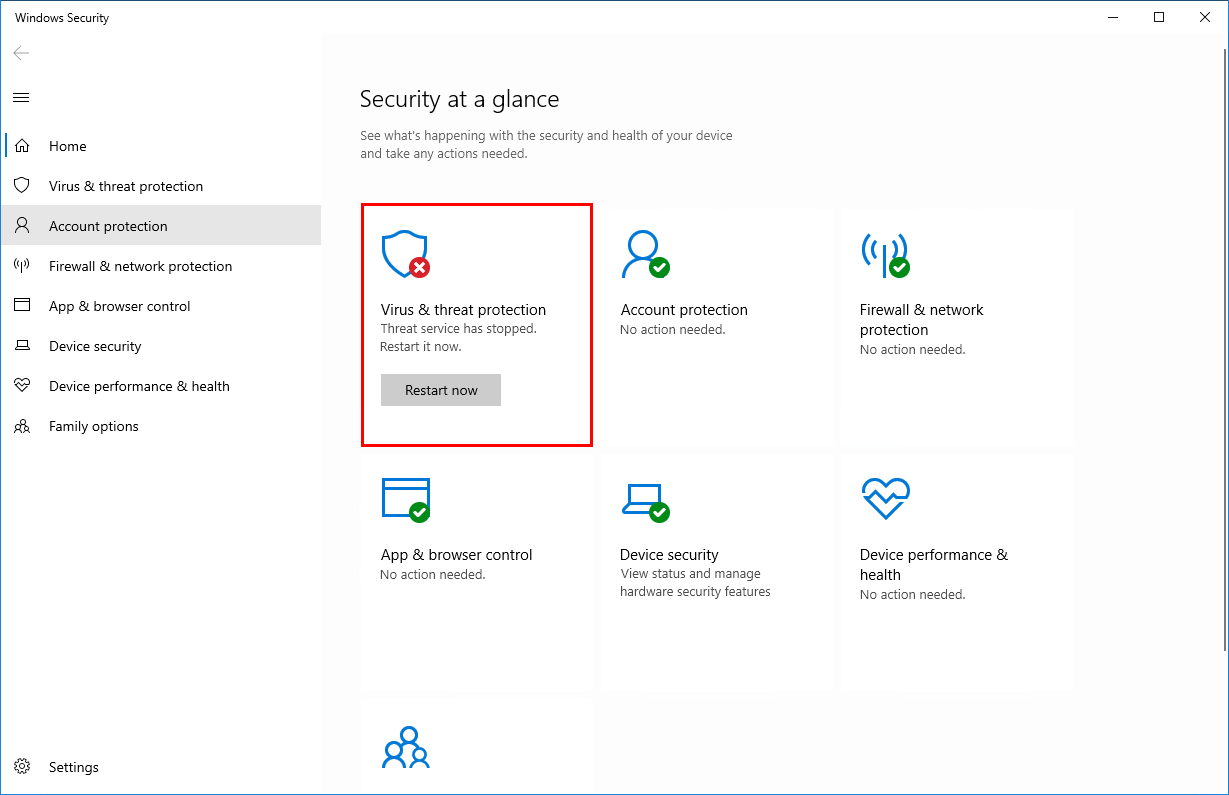
Suppose you like to revert the changes. First, boot into safe mode. After that, click on the Restart Now button in Windows Security. Another way is to start Autoruns and check the WinDefend service.
Keep on reading: Disable Windows Firewall with PowerShell »
Conclusion
In this article, you learned how to turn off Windows Defender in Windows 10 permanently. Make sure to follow the exact steps, as shown in the article. After doing that, Windows Defender will be kept turned off.
Did you enjoy this article? You may also like Disable Symantec Endpoint Protection (SEP). Don't forget to follow us and share this article.
How to Turn Off Antivirus Windows 10 Pro
Source: https://www.alitajran.com/turn-off-windows-defender-in-windows-10-permanently/
0 Response to "How to Turn Off Antivirus Windows 10 Pro"
Post a Comment